Showing posts with label Primer. Show all posts

Saturday, April 17, 2010

Day 28 (More Primer)

Today, Travis gave me a hand priming the car. I already noticed some rust on the car starting to accumulate on the charger. So we started by vacuuming the car out. The car was media blasted with wall nut shells so the stuff was everywhere. I would normally just blow it out with the air hose but I think that would have just spread it everywhere. Next time I am going to blow it off outside then vacuum it. I masked off the front half while Travis vacuumed. Since the front have is mostly going to be treated with POR-15, I didn't see the point in premiering it.


Once done, we wiped the whole car down with Lacquer Thinner, and started to apply the primer. We used the same Primer as before, just a lot more of it. We went through about a half gallon of the Primer. Anyway, here are the Pics...


Friday, April 09, 2010

Day 27 (Car is back from blasting)

I got the charger back from blasting. Its not as bad as I imagined but its still pretty bad. Here is a link to the photo album of the pictures.

Car After

Monday, April 05, 2010

Day 27 (More Primer)

I flipped the parts and primered again. Here are the pics...


Day 26 (Garage Modifications and primer)

I had to make a few modifications to my garage to set it up as a paint booth...


I put the first coat of primer on the parts. The gun spatterd a bit but got better as I painted. I talked to my dad and he mentioned I may need to increase the PSI.

I used PPG DP40LP Primer with DP402LF catalyst. The mixture is 2 parts Primer and 1 part catalyst.


Here are the pics...


Saturday, April 03, 2010

Day 25 (Parts back, Time to get started)

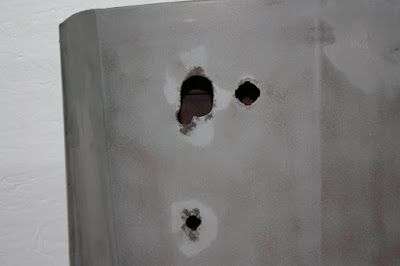
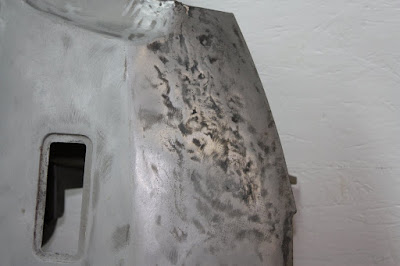
Okay, so I swaped the parts for the car today. It looks like it will be a few days before I see the girl again so I have to get the parts done before she gets back. We can see the what the parts look like now after the sandblasting. Each part had some damage to it. Mostly minor except a few.

Doors Outside:


Doors Inside:


Door Handle Damage Outside Driver:


Door Side View Mirror Damage Outside Driver:


Door Skin Damage Outside Passenger:


Door Handle Damage Outside Passenger (minor crack):


How to F*$% UP A DRIVER DOOR STRIKER PLATE:


How to REALLY REALLY F*$% UP A PASSENGER DOOR STRIKER PLATE:


Hood Outdside:


Hood Inside:


Hood Damage Outside Driver Front:


Hood Damage Outside Driver Rear:


Fenders Outside:


Fenders Inside:


Fender Damage Outside Driver:


Fender Damage Outside Driver 2:


Fender Damage Outside Driver 3:


Fender Damage Outside Driver 4:


Fender Damage Outside Passenger:


Deck Lid Inside:


Deck Lid Damage Inside Driver:


Deck Lid Damage Inside Passenger:


Deck Lid Outside:


Now that the parts are back its time for some POR-15 under coating. This is somewhat of a super strong rust preventive paint. The best part is that it can be brushed on by a paint brush. This seemed easy in my mind, however, trying to fit a paintbrush in a door shell proved to be quite difficult. I went ahead and painted the inside of the 2 inner fenders and the inner doors. I did make a mess of a few areas. I should have maked off ALL the holes as paint seeped out of a few holes here and there. I will have to clean these up tomorrow before I shoot the primer.