Saturday, September 17, 2011

Day 51 - Front clip

Today, Travis and I attached the front clip to the charger to get a better Idea as to where the doors should be.


We found that we should start the alignment with the hood to cowl gap, then the fenders to the hood gap, then the doors to the fender and then we should be in a good position to verify the door jamb placement and quarter panel location.

Saturday, September 03, 2011

Day 50 - Quarter Panel (continued)

Today, we did several test fits of the quarter panel. we are getting closer each time but we still have a ways to go. The trunk extension panel is fitting much better after hammering on it for an hour. It looke the quarter panel is to high in the front and wheel wells still have a 1/4" gap between the panels. Back to the drawing board....


Saturday, July 02, 2011

Day 49 - Extension panel and Quarter Panel

Today we started by attempting to align the door to the door jamb just to see if we are anywhere in the realm of being accurate.


Next we cut off the rest of the old quarter panel and attempted to do the first test fit of the new quarter panel.


It looks good from a distance by the wheel well seems are about 1 inch off and it looks like it may be too far forward.


It also looks that the trunk extension panels are pushing down on the quarter panel. This took some considerable time with a hammer and dolly to get them even close. Lesson learned: never order parts from anywhere but AMD. I got the trunk floors from good year nearly 7 years ago and they suck. The stamp is crappy and requires a lot of manual work just to get them to KINDA fit.


Saturday, April 09, 2011

Day 48 - Door Jamb and more rear window malarkey!

Today, I went ahead and replaced the door jamb with the new one from AMD. This is an excellent part. Its super heavy duty and comes with the striker bracket on the back. I had marked where i removed the old one, however this one seemed a little bit shorter when it came to the lower part of the door sill. I took my best guess and spot welded it into place.


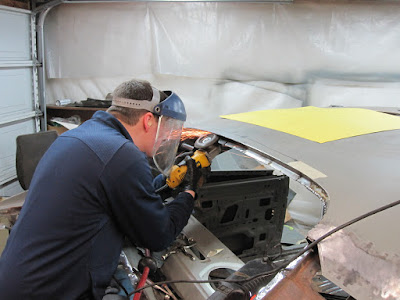
Travis continued working on the interrior lower rear window frame. This required a custom piece to be fabricated and fudged into place. I know this isn't the perfect way to do this, but I am not going for a show car here, just a daily driver.


We also attached the new door for a test fit.


Sunday, February 27, 2011

Day 47 - More Quarter Panel Removal

Today Travis and I removed the lead from the joints of the roof and quarter panel. Then I removed the rest quarter panel. Travis worked on the rear window frame trying to manufacture a lower corner.

Here is a video of the lead melting:


Saturday, February 19, 2011

Day 46 – The dreaded rear window frame 2

Okay, so the show has been on hiatus since the last post. I had a few issues with the welder we just couldn’t figure out. Now that has all been squared away we can get to rebuilding the rear window frame piece by piece. Each piece was made by creating a template with some poster board. Then transferring that template to metal and then cutting it out. We then had to fiddle with the fit for a while before tacking each piece into place.